Recent Storm Damage Posts
What Can I Expect During Storm Damage Restoration?
8/26/2024 (Permalink)
 Storm Damage Restoration in North Central Colorado Spring
Storm damage can be overwhelming, leaving your home or business in disarray and causing significant stress. Understanding what to expect during the storm damage restoration process can help alleviate some of that anxiety and ensure you are well-prepared for the steps ahead. This blog will walk you through the typical stages of storm damage restoration, from the initial assessment to the final cleanup, so you can navigate this challenging time with confidence.
1. Initial Assessment and Inspection
The first step in the storm damage restoration process is a thorough assessment and inspection of the affected property. A professional restoration team will arrive at your property to evaluate the extent of the damage caused by the storm. This assessment is crucial as it helps to determine the scope of work required and the resources needed for the restoration process.
During the inspection, the team will look for:
Structural Damage: This includes checking for any damage to the roof, walls, windows, and foundation of the building. Storms can cause significant structural issues that need to be addressed immediately to ensure the safety of the property.
Water Damage: Flooding and heavy rains can lead to water infiltration, which can cause serious problems like mold growth, wood rot, and damage to electrical systems. The restoration team will assess the extent of water damage and identify areas that require drying and dehumidification.
Debris and Hazardous Materials: Storms often leave behind debris such as fallen trees, broken glass, and other hazardous materials. The team will identify and document these hazards to ensure they are safely removed during the cleanup process.
Once the assessment is complete, the restoration company will provide you with a detailed plan outlining the necessary steps, estimated timeline, and costs involved in the restoration process.
2. Emergency Tarping and Board-Up Services
If your property has sustained significant damage, such as a compromised roof or broken windows, emergency tarping and board-up services may be required to prevent further damage. The restoration team will quickly secure your property by covering exposed areas with tarps and boarding up broken windows or doors. This step is essential to protect your property from additional damage caused by rain, wind, or unauthorized entry.
Emergency services also help to stabilize the situation and create a safer environment for the restoration crew to work in. It is important to address these immediate concerns before moving on to the more extensive restoration work.
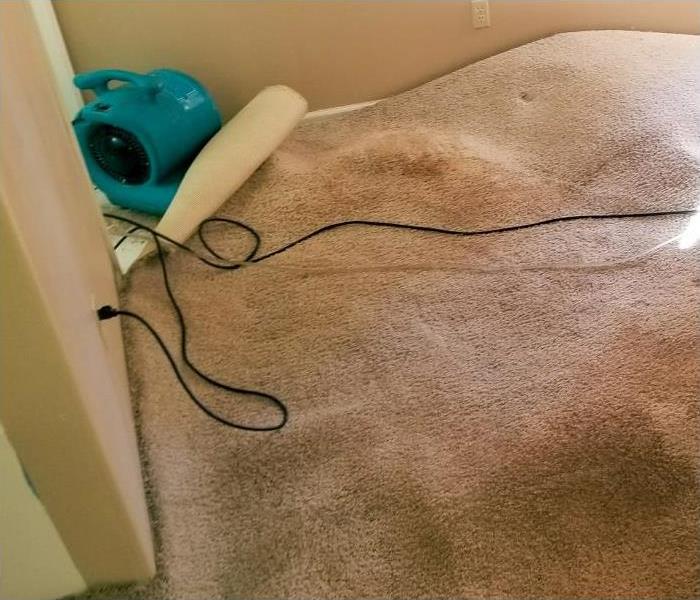
3. Water Extraction and Drying
Water damage is one of the most common and destructive consequences of storms. After securing your property, the restoration team will begin the water extraction process. This involves removing standing water using specialized pumps and vacuums to prevent further damage to your property.
Once the standing water has been removed, the drying process begins. The team will use industrial-grade dehumidifiers and air movers to thoroughly dry out the affected areas. Proper drying is crucial to prevent mold growth and to ensure that any hidden moisture pockets are eliminated.
In some cases, the restoration team may need to remove damaged materials such as carpeting, drywall, and insulation if they are beyond repair. These materials will be carefully disposed of to avoid cross-contamination.
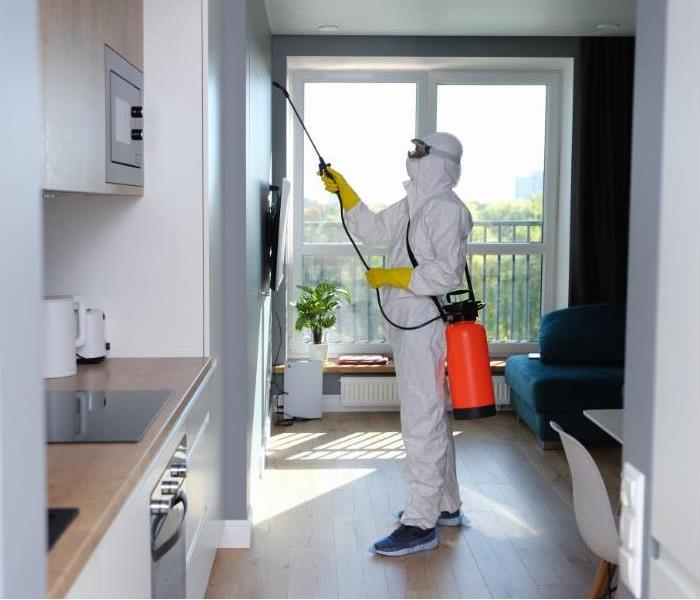
4. Mold Remediation
Mold can begin to grow within 24 to 48 hours after water damage occurs, making mold remediation a critical step in the restoration process. If mold is detected during the initial inspection or during the drying process, the restoration team will take immediate action to contain and remove it.
Mold remediation involves:
Containment: The affected area will be sealed off to prevent the spread of mold spores to other parts of the property.
Removal: Mold-infested materials will be carefully removed and disposed of. The team will also clean and disinfect the area to eliminate any remaining mold spores.
Air Filtration: High-efficiency particulate air (HEPA) filters will be used to remove airborne mold spores from the environment, improving air quality and reducing the risk of further contamination.
The goal of mold remediation is to restore a safe and healthy environment for you and your family or employees.
5. Structural Repairs and Restoration
With the property dried out and mold concerns addressed, the next phase is structural repairs and restoration. This stage involves repairing or replacing damaged components of your property, including the roof, walls, floors, and windows.
The scope of structural repairs will depend on the extent of the damage. In some cases, minor repairs such as patching holes in the roof or replacing broken windows may be sufficient. However, more severe damage may require extensive reconstruction, including rebuilding entire sections of the property.
During this phase, the restoration team will also address any cosmetic issues, such as repainting walls, installing new flooring, and restoring cabinetry or fixtures that were damaged in the storm.
6. Contents Restoration
In addition to the structural restoration of your property, the restoration team will also focus on restoring your personal belongings. Contents restoration involves cleaning, repairing, and restoring items that were damaged during the storm, such as furniture, electronics, clothing, and documents.
The restoration team will use specialized techniques and equipment to clean and deodorize items, as well as restore them to their pre-damage condition. In some cases, items that are too severely damaged may need to be replaced, but the team will work diligently to salvage as much as possible.
7. Final Cleanup and Sanitization
Once all repairs and restoration work have been completed, the final step is a thorough cleanup and sanitization of the entire property. The restoration team will remove any remaining debris, dust, and contaminants, ensuring that your property is clean and safe for occupancy.
This step includes:
Deep Cleaning: All surfaces will be cleaned and disinfected, including floors, walls, and fixtures.
Odor Removal: Any lingering odors caused by water damage or mold will be addressed using advanced deodorization techniques.
Air Quality Testing: The team may conduct air quality tests to ensure that the indoor environment is free from harmful pollutants and allergens.
The goal of the final cleanup and sanitization process is to leave your property in a pristine condition, making it feel as though the storm damage never occurred.
8. Post-Restoration Inspection and Follow-Up
After the restoration work is complete, the team will conduct a final inspection to ensure that all aspects of the project have been properly addressed. They will walk you through the restored areas, explaining the work that was done and answering any questions you may have.
Additionally, reputable restoration companies often provide follow-up services to check on the property after a certain period, ensuring that no issues have arisen since the restoration was completed. This commitment to customer satisfaction gives you peace of mind that your property has been fully restored and is ready for normal use.
Storm damage restoration is a complex and multi-step process that requires the expertise of trained professionals. By understanding what to expect during each phase of the restoration process, you can better prepare for the journey ahead and work closely with the restoration team to achieve the best possible outcome. Whether it's securing your property, drying out water damage, or restoring your belongings, the goal of storm damage restoration is to return your home or business to its pre-storm condition, allowing you to move forward with confidence.
Understanding Storm Damage in Colorado Springs, CO
7/4/2024 (Permalink)
 Storm Damage in Colorado Springs, CO
Colorado Springs, situated at the foot of the Rocky Mountains, is known for its stunning landscapes and dynamic weather patterns. While the city's location provides breathtaking views and a plethora of outdoor activities, it also subjects the area to frequent and sometimes severe storms. These storms can range from intense thunderstorms and hail to heavy snowfall and even the occasional tornado. As a result, homes and businesses in Colorado Springs often face significant storm damage, necessitating prompt and professional mitigation services.
The Nature of Storm Damage in Colorado Springs
Storm damage in Colorado Springs can manifest in various forms, each posing unique challenges and risks:
Wind Damage: High winds can cause extensive damage by ripping off roofing materials, breaking windows, and toppling trees. This can lead to structural damage and create openings that allow rain to penetrate, causing further harm.
Hail Damage: Hail is a common occurrence in Colorado Springs, especially during the spring and summer months. Hailstones can range in size from small pellets to large golf balls, and they can cause significant damage to roofs, siding, windows, and vehicles.
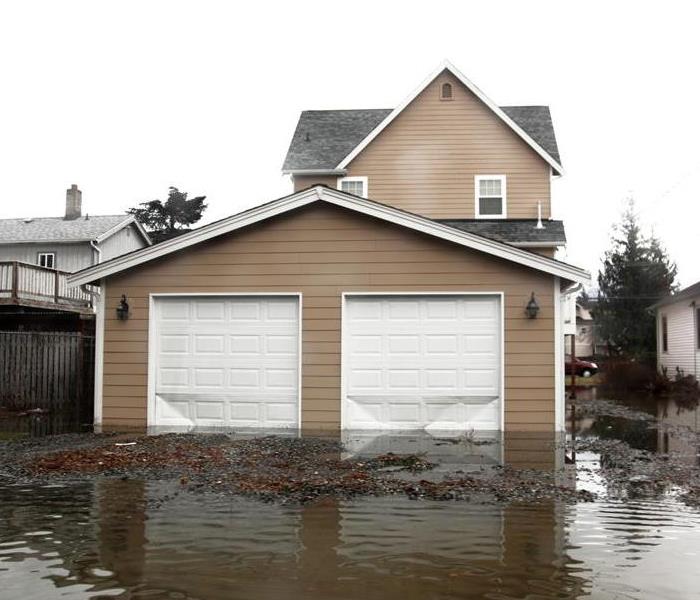
Flooding: Heavy rain and rapid snowmelt can result in flooding, which can devastate homes and businesses. Floodwaters can saturate building materials, ruin personal belongings, and create an environment conducive to mold growth.
Snow and Ice: Winter storms bring their own set of challenges, with heavy snow and ice accumulation posing risks to roofs and structures. Ice dams can form on roofs, causing water to back up and seep into the building, leading to interior water damage.
Lightning: Although less common, lightning strikes during storms can cause fires and electrical damage, posing serious risks to property and safety.
Given these diverse threats, it’s crucial for residents and business owners in Colorado Springs to have a reliable partner in storm damage restoration. This is where SERVPRO comes into play.
How SERVPRO Can Help Mitigate Storm Damage
SERVPRO, a leader in the restoration industry, specializes in storm damage mitigation and restoration. With years of experience and a team of highly trained professionals, SERVPRO is equipped to handle the aftermath of any storm. Here's how SERVPRO can assist Colorado Springs residents and businesses in the wake of storm damage:
Rapid Response and Assessment
When a storm hits, time is of the essence. SERVPRO understands the importance of a quick response to minimize damage and prevent further issues. Their team is available 24/7, ready to mobilize and arrive on-site promptly. The first step in their process is a thorough assessment of the damage. Using advanced technology and their expertise, they identify the extent of the damage and develop a comprehensive restoration plan.
Water Extraction and Drying
Water damage is a common consequence of storms, whether from rain, flooding, or snowmelt. SERVPRO employs powerful pumps and industrial-grade vacuums to extract water from affected areas swiftly. Once the water is removed, they use high-tech drying equipment and techniques to ensure all moisture is eliminated. This step is crucial in preventing mold growth, which can begin within 24-48 hours of water exposure.
Structural Repairs and Restoration
Storms can cause structural damage that compromises the safety and integrity of buildings. SERVPRO's team includes skilled construction professionals who can repair and rebuild damaged structures. From replacing roofing materials and siding to repairing windows and doors, they ensure that the property is restored to its pre-storm condition.
Mold Remediation
Mold can develop quickly in the aftermath of a storm, particularly if water damage is not addressed promptly and thoroughly. SERVPRO's mold remediation experts follow a stringent process to remove mold safely and effectively. They identify and contain the mold growth, use specialized cleaning agents to eliminate it, and implement preventive measures to reduce the risk of future mold issues.
Content Restoration
Storm damage often affects personal belongings and important documents. SERVPRO offers content restoration services to clean, sanitize, and restore items that can be saved. Using specialized techniques, they can recover and preserve items such as photographs, artwork, electronics, and furniture.
Insurance Coordination
Navigating the insurance process after storm damage can be overwhelming. SERVPRO works closely with insurance companies to streamline the claims process for their clients. They provide detailed documentation of the damage, a comprehensive restoration plan, and regular updates to both the property owner and the insurance company. This collaboration helps ensure a smoother and more efficient claims process.
Preventive Measures and Advice
In addition to restoration services, SERVPRO offers valuable advice and preventive measures to help property owners protect their homes and businesses from future storm damage. This can include recommendations for improved drainage systems, better roofing materials, and proper landscaping to minimize the risk of flooding and wind damage.
Why Choose SERVPRO?
SERVPRO stands out for its commitment to quality, customer satisfaction, and professionalism. Here are a few reasons why Colorado Springs residents and business owners should consider SERVPRO for storm damage restoration:
Expertise and Experience: With decades of experience in the restoration industry, SERVPRO has the knowledge and skills to handle any storm damage scenario.
Advanced Technology: SERVPRO uses state-of-the-art equipment and techniques to ensure efficient and effective restoration.
24/7 Availability: Storms don’t adhere to a schedule, and neither does SERVPRO. Their team is available around the clock to respond to emergencies.
Comprehensive Services: From initial damage assessment to final repairs, SERVPRO provides a full range of restoration services, making them a one-stop-shop for storm damage mitigation.
Customer-Centric Approach: SERVPRO prioritizes customer satisfaction, working closely with clients to ensure their needs are met and their properties are restored to the highest standards.
Storms are an inevitable part of life in Colorado Springs, but the damage they cause doesn’t have to be. With a trusted partner like SERVPRO, residents and business owners can rest assured that their properties will be restored swiftly and efficiently. From water extraction and structural repairs to mold remediation and content restoration, SERVPRO has the expertise and resources to handle every aspect of storm damage restoration. When the storm clouds clear, SERVPRO is there to help rebuild and restore, bringing peace of mind and a sense of normalcy back to the community.
6 Steps to Prevent Frozen Pipes in North Central Colorado Springs, CO.
12/26/2023 (Permalink)
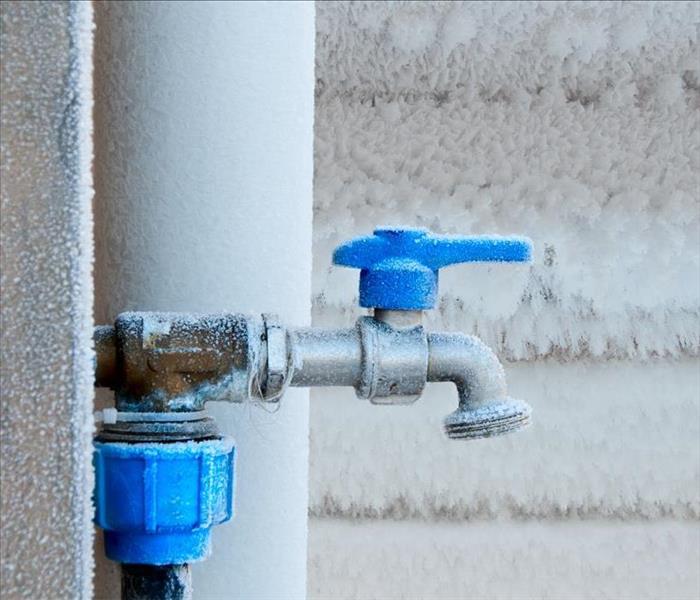 A frozen faucet in Colorado Springs, CO.
Winter in Colorado Springs, CO brings with it a magical snowy landscape, cozy fires, and the holiday spirit. However, it also ushers in freezing temperatures that can wreak havoc on your home's plumbing. One of the most common and potentially costly issues during this season is frozen pipes. When temperatures plummet, the water inside pipes can freeze, leading to cracks, bursts, and extensive damage. To help you fortify your home against the winter chill, we've compiled a comprehensive guide with six effective strategies to prevent your pipes from freezing in Colorado Springs.
6 Strategies to Prevent Frozen Pipes
1. Insulate:
Proper insulation is the first line of defense against frozen pipes. In a region where winter temperatures can be particularly harsh, it's crucial to ensure that all exposed pipes are well-insulated. Start by identifying pipes in vulnerable areas such as attics, basements, and crawl spaces. Foam pipe insulation is a cost-effective and efficient solution, wrapping around pipes to provide a protective barrier against the cold. Additionally, consider using heating tape for an extra layer of warmth, especially in areas prone to extreme cold.
Don't forget about areas where cold air might find its way into your home. Check for gaps or cracks in your home's foundation and walls and seal them promptly. By fortifying your home's envelope, you not only protect your pipes but also enhance your overall energy efficiency.
2. Keep Your Home Warm:
Maintaining a consistent indoor temperature is key to preventing frozen pipes. While it might be tempting to lower your thermostat to save on heating costs, the risk of frozen pipes increases with a significant temperature drop. Aim to keep your home at a minimum of 55 degrees Fahrenheit, even when you're away. This not only protects your pipes but also ensures a comfortable living environment.
Investing in a smart thermostat can be a wise decision. These devices allow you to program your heating system efficiently, ensuring that your home stays warm when needed and conserving energy when you're not around. Some smart thermostats even provide alerts if the temperature inside your home drops to a level that could put your pipes at risk.
3. Let the Faucets Drip:
Running water, even at a trickle, can be a simple yet effective strategy to prevent pipes from freezing. When water flows through the pipes, it relieves pressure and reduces the risk of freezing. Focus on faucets connected to pipes that run through unheated or poorly insulated areas, such as those in exterior walls.
It's important to note that the goal is not to waste water but to create a steady flow that discourages freezing. During particularly cold nights, letting faucets drip in different parts of your home can provide added protection. This proactive measure is especially useful for homes with a history of frozen pipes or those in areas prone to severe winter weather.
4. Open Cabinet Doors:
Kitchen and bathroom cabinets often house pipes, and these spaces can become quite chilly, especially if they are located against exterior walls. To encourage the flow of warm air around the pipes, keep cabinet doors open during extremely cold weather. This allows the heat from your home's interior to reach the pipes and helps maintain a temperature that discourages freezing.
For added insulation, consider placing a towel or foam board at the back of the cabinet to create a barrier between the pipes and the cold air. By taking this simple step, you enhance the effectiveness of your heating system and reduce the risk of frozen pipes in these vulnerable areas.
5. Seal Leaks and Cracks:
A thorough inspection of your home for potential points of entry for cold air is essential in preventing frozen pipes. Cracks in windows, doors, and foundation walls can allow frigid air to seep in, putting your pipes at risk. Take the time to inspect these areas and seal any gaps using weatherstripping, caulk, or insulation.
Start by examining the exterior of your home, paying attention to window frames, door seals, and any visible cracks in the walls. Move inside and check for drafts near windows and doors. Attics and basements are also common culprits for air leaks. By addressing these issues, you not only protect your pipes but also enhance the overall energy efficiency of your home.
6. Disconnect and Drain Outdoor Hoses:
Outdoor hoses and faucets are particularly vulnerable to freezing temperatures. Before winter arrives in full force, take the time to disconnect and drain all outdoor hoses. Shut off the water supply to exterior faucets and drain any remaining water from the pipes. This prevents water from lingering in the pipes outside and minimizes the risk of freezing and subsequent damage.
Consider installing frost-free hose bibs if your home doesn't already have them. These bibs are designed to prevent water from remaining in the exposed portion of the pipe, reducing the likelihood of freezing. Taking proactive steps to winterize your outdoor plumbing can save you from the headache of dealing with burst pipes when spring arrives.
In conclusion, safeguarding your pipes from freezing in Colorado Springs requires a combination of proactive measures and thoughtful home maintenance. By insulating, regulating indoor temperatures, letting faucets drip, opening cabinet doors, sealing leaks, and disconnecting outdoor hoses, you can significantly reduce the risk of frozen pipes and the headaches that come with them. This winter, take the necessary steps to fortify your home, ensuring a warm and worry-free season for you and your pipes. Remember, a little preparation goes a long way in protecting your home from the winter chill. Stay warm, stay safe!
Winterizing Your Home in Colorado Springs: A Comprehensive Guide to Ensure a Cozy and Damage-Free Season
11/9/2023 (Permalink)
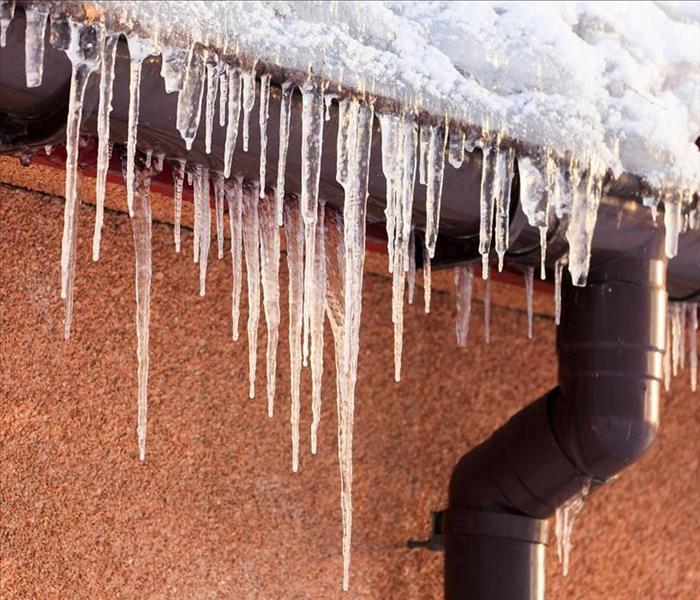 Clogged gutters can lead to ice dams in Colorado Springs, CO.
As the autumn leaves fall and a chill creeps into the air, residents of Colorado Springs know that winter is just around the corner. While the snow-covered landscapes are undeniably beautiful, the winter season can pose challenges for homeowners. From freezing temperatures to heavy snowfall, it's essential to prepare your home to withstand the elements and avoid costly damage. In this comprehensive guide, we'll delve into a variety of measures you can take to winterize your home in Colorado Springs, CO effectively.
- Sealing the Leaks: Inspect and Seal Windows and Doors
The first line of defense against the winter cold is ensuring that your home is properly sealed. Check for any gaps or cracks in windows and doors, as these can allow cold drafts to enter, making your heating system work harder and increasing energy costs. Utilize weatherstripping and caulk to seal these gaps, creating a more energy-efficient and comfortable living environment.
- Heating System Maintenance: Ensuring Warmth When You Need It
The heart of your winter readiness plan lies in the efficiency of your heating system. Don't wait until the mercury drops to have it inspected. Schedule a professional service to check for any issues, replace filters, and ensure that your heating system is operating at peak performance. Consider upgrading to a programmable thermostat for better control and energy savings.
- Guarding Against Frozen Pipes: Insulation and Prevention
Frozen pipes can wreak havoc on your home, leading to expensive repairs. Insulate exposed pipes in unheated areas, and consider using heat tape for added protection. Disconnect and drain outdoor hoses, and shut off the water supply to outdoor faucets. Taking these precautions will help prevent freezing and ensure a steady flow of water throughout the winter.
- Clearing the Way: Gutter Maintenance for Ice Dam Prevention
Clogged gutters can lead to ice dams, which can cause damage to your roof and interior spaces. Clean gutters and downspouts of leaves and debris to allow for proper drainage. Ensure that downspouts direct water away from your home's foundation to prevent ice buildup. Consider installing gutter guards to minimize the accumulation of debris.
- Up on the Rooftop: Roof Inspection and Maintenance
Your roof bears the brunt of winter weather, and it's crucial to inspect it for any vulnerabilities. Check for loose or damaged shingles and address them promptly. Look for signs of leaks and ensure that your attic is adequately insulated to prevent ice dams. If you're uncertain about your roof's condition, consult with a professional roofing contractor.
- Winter Essentials: Stocking Up for Storms
Prepare for winter storms by stocking up on essential supplies. Rock salt, snow shovels, and emergency kits should be readily available. Create an emergency kit with flashlights, batteries, blankets, and non-perishable food items in case of power outages. Being prepared ensures that you can weather the storm comfortably and safely.
- Landscaping for Winter: Trim, Clear, and Protect
The winter landscape may be harsh, and your landscaping should be adapted accordingly. Trim tree branches that could pose a threat under the weight of snow or ice. Clear dead vegetation from around your property to reduce fire hazards and make snow removal more manageable. Consider using burlap or other protective coverings for delicate plants.
- Insurance Check: Reviewing Your Coverage
Before winter arrives in full force, take the time to review your homeowner's insurance policy. Ensure that it provides adequate coverage for winter-related damage, including snow and ice damage. Understand the specifics of your policy, and make any necessary adjustments to guarantee comprehensive protection for your home.
As winter approaches, taking these proactive measures can make all the difference in safeguarding your home against the challenges of the season. From insulating windows to maintaining your heating system and preparing for winter storms, a comprehensive approach ensures that your home remains warm, comfortable, and free from winter-related damage. By investing the time and effort now, you'll enjoy a worry-free winter in the picturesque surroundings of Colorado Springs. Stay cozy, stay prepared!
Sewage Has Backed Up Into My Bathtub! Now What?
8/18/2023 (Permalink)
 Sewage back up in Colorado Springs, CO.
No one expects a sewer backup, much less to encounter raw sewage backing up into their Colorado Springs, CO, bathtub. Unfortunately, it is a possibility that some homeowners must face at some point. It's essential to get the problem solved as soon as possible to avoid the various hazards resulting from sewage going where it shouldn't.
7 Steps for Dealing With a Bathtub Backup
The key to appropriately dealing with a sewage backup is to clean the area thoroughly while preventing cross-contamination into unaffected areas. There are several basic steps for accomplishing these goals safely.
1. Keep Everyone Out of the Affected Area
First, it's critical to keep everyone not working in the affected area out until it's safe, especially children and pets. Raw sewage needs to be handled with care to not spread the bacteria even more than it has already dispersed.
2. Turn Off the Electricity
If there is a chance that the standing water has come into contact with electrical outlets or plugged-in electronics, shutting off the electricity before entering the area is vital. An electric current could be traveling through the water, so if you can safely reach the breaker box, turn off the electricity to the affected area or the whole house.
3. Protect Yourself With Personal Protective Equipment
When dealing with raw sewage, anyone working in the area needs to protect themselves as much as possible. Sewage carries germs, bacteria and diseases that can be hazardous if people encounter them unprotected. Therefore, you must put on PPE before entering the affected area. Then, you must remove the PPE every time you exit the area to prevent cross-contamination to other parts of your home.
Depending on the severity of the sewer backup, you may choose to wear only a few PPE items such as protective glasses, a respirator and latex gloves. You could also wear hair coverings, coveralls and shoe coverings for more protection.
4. Extract All Water
Removing the standing water could be relatively quick and straightforward if you have a wet/dry vacuum; it can also remove small debris. If not, a mop and towels may have to suffice. Hiring water damage restoration specialists is typically the best solution because these workers have the expertise and industrial-grade equipment to ensure a quality, thorough job.
5. Dispose of Unsalvageable Materials
Anything porous item that has soaked up the water probably will be unsalvageable, as you may not be able to clean and dry it thoroughly. You must throw out these materials, which could include things like wood flooring, carpet, wooden furniture, wooden cabinets and drywall.
6. Clean and Sanitize Everything That Remains
Cleaning and sanitizing the entire affected area and its contents is one of the most critical parts of the job after sewage flooding. You can purchase products in stores or simply make a bleach/water solution. Everything must be wiped down with this mixture.
7. Dry Everything Completely
To avoid more water damage and mold growth, you will need to quickly and completely dry all that remains. You can turn on the ventilation fan in the bathroom, open windows and doors, and run dehumidifiers, heaters and fans.
It's always beneficial to be proactive when it comes to home issues. If you discover a sewer backup, remember to perform these basic steps to mitigate the damage.
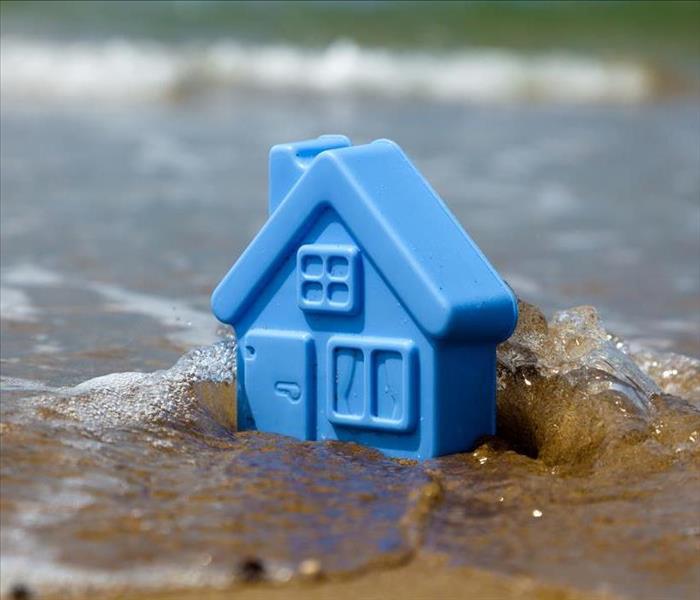
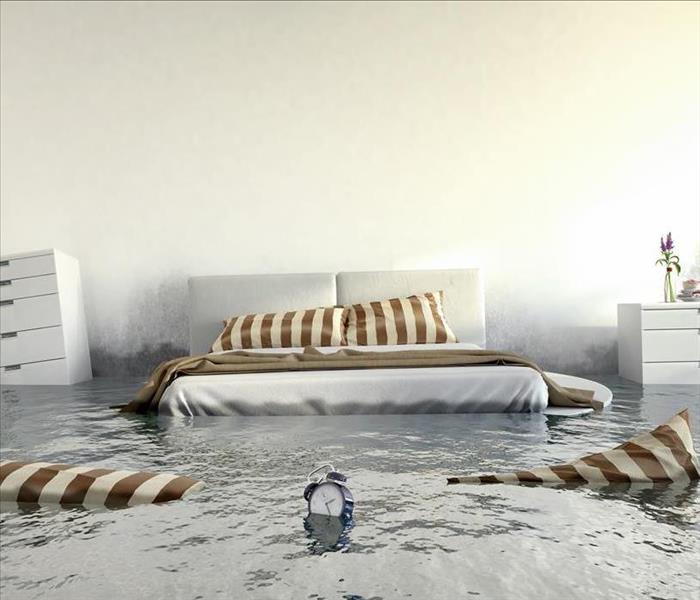
Is This Flood Black Water?
7/20/2022 (Permalink)
 Floodwaters can damage your home.
Watching floodwaters flow into your Colorado Springs, CO, home is one of the most devastating things you can witness. Not only will the contents of your home be damaged, but the structure could also be. Water damage begins immediately, so it's imperative to eliminate and clean it as soon as possible. However, you first must determine what kind of water it is. This depends partially on the origin of the flood. There are three categories of water, each of which presents a different level of risk to your family and pets:
- Category 1: Known as clean water, this is safe to drink, equivalent to the water that comes out of the tap. It could result from a burst pipe or leaky appliance. Although it's clean to begin with, it will become hazardous if it comes into contact with a contaminated surface or substance.
- Category 2: Also known as grey water, it could make people and pets sick if consumed but is not toxic. The water may come from bathtubs, washing machines or dishwashers.
- Category 3: Black water is toxic due to high contamination. The water may contain raw sewage, viruses, bacteria, or harsh chemicals. They can be poisonous to humans and pets and cause more property damage than clean or grey water.
How Do I Safely Clean Black Water?
If you find that you have a Category 3 flood, you must take extra precautions to protect everyone in your home and the property itself. The best option is to hire water damage restoration experts to ensure the job is handled safely, thoroughly and quickly.
1. Protect Yourself With PPE
Safety is the most critical aspect, so wearing personal protective equipment from beginning to end anytime you're in the affected area is essential. This PPE generally includes the following:
- Hair coverings
- Eye protection
- Mask or respirator
- Waterproof coveralls
- Waterproof gloves
- Waterproof boots or shoe coverings
This PPE should be put on before entering the area, taken off before leaving the site, and then replaced when returning to the area.
2. Shut Off the Electricity
Before entering the affected area, it's vital to shut off the electricity to that part of the house or the whole house. Otherwise, an electrical current could be flowing through the standing water, which is highly unsafe for humans and pets.
3. Remove Water and Moisture
Extract all the standing water with a wet/dry vacuum if you have one. If not, mops and towels should be sufficient.
4. Clear the Area
Clear everything out of the affected area as much as possible. This will also allow more room for cleaning and drying the flooded area. You will probably have unsalvagable items to throw away and other items that will need to dry out.
5. Clean and Sanitize
Everything the water has touched needs to be cleaned and sanitized. This includes floors, walls and furniture. It must be disposed of if it can't be adequately cleaned and dried.
6. Dry Everything
Finally, everything must be dried thoroughly and quickly. Mold can start growing and spreading within 24 hours of moisture exposure, so it's essential to remove excess moisture from the area. You can use fans, dehumidifiers, fresh air and heaters to assist the drying process.
Water damage advances quickly, especially in the case of a flood. Black water adds another hazardous element to the mix. It's helpful to know about the risks before a disaster transpires.
What You Need To Have Cleaned After a Flood
7/19/2022 (Permalink)
 Clean your flooring after a flood.
Severe weather and storms can be devastating. The flood afterward can make things worse. When you are allowed to enter your home after a severe weather incident, you may look around at the damage and wonder how to begin.
The first thing that you want to do is call your insurance company. Many insurers recommend using a damage remediation company in Colorado Springs, CO because they know the cleaning requirements for these situations. There are very specific guidelines that you need to follow because flooding presents more dangers than just water.
4 Places That Need Cleaning After a Flood
- Flooring
When you begin your flood clean up process, you will need to clean your floor and, if you have carpet or vinyl, your subfloor. Mold or mildew can build up between your flooring and subfloor when you don't. These toxins can continue to grow unchecked. It can cause health effects to you or your family.
- Basements
Your basement's cleaning requirements will depend on where you live and what type of basement you have. No matter what, the first thing you need to do is pump any remaining water out. Be sure to do this safely, because the flood water will be contaminated.
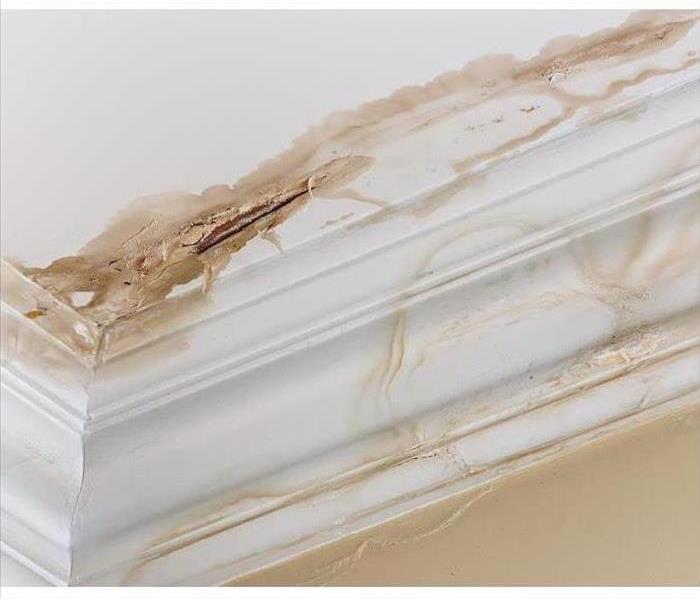
- Ceilings and Walls
To clean your ceiling and walls, your cleaning company will have to use a flood disinfectant approved by the environmental protection agency. These cleaners contain harsh chemicals and may be unsafe if you do not have the proper personal protection equipment. Your cleaning company will already have this on hand.
- Kitchen Surfaces and Dishes
If your kitchen floods, you have to pay particular attention to all of your kitchen surfaces and dishes. While the floodwaters recede, they can produce dangerous toxins, and these toxins have to be removed before you can use your kitchen surfaces and dishes again.
In the case of severe flooding, consider a qualified cleaning company. They will know all of the cleaning requirements for your area. They can make sure your home is safe to reenter.
How Does an Ice Dam Form and What You Should Do About It
5/24/2022 (Permalink)
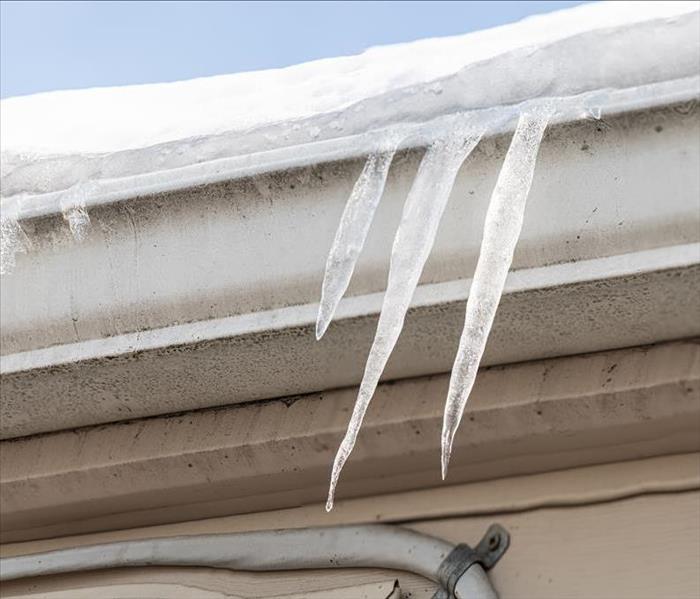 Know how an Ice Dam forms by Following Our Tips.
Homeowners in Colorado Springs, CO, face several obstacles after a snow storm. An ice dam is one of them. This buildup of frozen water accumulates along the edge of the roof. Instead of melting, it remains there, blocking moisture from moving downward.
This situation leads to physical concerns that could increase repair costs and needs. Owners must check their roofs and understand what to do if they suspect this trouble has started.
Important questions to consider as regards an Ice Dam
Why Doesn't All of the Ice Melt After a Winter Storm?
It seems natural that everything would flow away at once. That doesn't always happen, though. How does part of the roof break down but not the other? It depends on several critical factors:
- The temperature of the roof level
- The roof's structure
- The placement of heating sources
Snow melts at 0 degrees Celsius or 32 degrees Fahrenheit. This number remains vital in an ice dam's formation. If a roof has an even slope and the entire structure's temperature falls at 32 or higher, the snow dissolves without a problem.
Some roofs, however, have formations that allow for temperatures to vary. The top may reach 32, but the bottom stays lower. The ice clings to the roof's colder areas. When this situation occurs, a barrier blocks the other liquid.
In addition, remember that hot air rises. The temperature inside the home may force warmer temperatures to occur at the house's peak. The snow melts there but not at the lower locations. Several factors impact this event, such as insulation and conduction.
What Problems Can Ice Dams Cause?
Homeowners don't want moisture to develop on the rooftop. The water has nowhere to go, so it sits, absorbing into small cracks or gaps within the shingles and flashing. The ice dam proves hazardous to the structure, dampening materials and allowing the fungus to reproduce.
Microbes such as mold and mildew thrive in these dark, damp locations. They feast on wet, organic matter such as wood and insulation, making the roof a perfect host. Once they set in, they grow at rapid rates, increasing exponentially within one to two days.
Furthermore, water adds heaviness to a home's roof. The upper level should protect, keeping external elements out. However, too much water could cause a collapse.
What Action Should Homeowners Take?
After a snowstorm, inspect the property for any damage. Pay close attention to the roof and the drainage. If you think ice has formed a barricade along the roofline, reach out to water damage experts in Colorado Springs, CO. The experts can assess the situation and create an action plan to restore the premises.
Check on your ice dam coverage; speak with your insurance company, and open a claim. Make sure the snow is taken off of the roof. Improve flow as much as possible to eliminate the excess water. This step minimizes further deterioration.
Allow the specialist to seal off any exposures, preventing leaks and decreasing contamination. In addition, monitor temperatures and avoid creating situations that promote fungus growth.
If you're a homeowner, know how an ice dam forms and how you should react to it. Focus on clearing the structure and keeping it dry. Contact professionals for an assessment and remediate any water damage.
What Can I Expect During Storm Damage Restoration?
1/19/2022 (Permalink)
 Be ready for Storm Damage Restoration by following these tips. If any doubt arises, just contact us.
A heavy rainstorm in Colorado Springs, CO, can quickly wreak havoc on your home. Blowing wind and flooding water are often the main concerns during a storm and tend to cause the most destruction. As a result, wind and rain can lead to roof damage requiring a temporary tarp, water damage requiring tear out, and various other remediation strategies. You must take fast action to minimize loss. This usually involves:
- Notifying your insurance company
- Documenting the damage in detail
- Mitigating damage until restoration can begin
- Calling professionals for cleanup and repair
Once the professionals arrive on the scene, you will be on the road to restoration. Depending on the amount and type of damage sustained, techniques can vary, but you can typically expect some particular aspects as a rule.
Professional Restoration Procedures
When you hire storm restoration experts, they will usually go through standard procedures for water cleanup. You will notice the technicians:
1. Wearing Personal Protective Equipment
Your remediation team will wear personal protective gear for their own safety and prevent cross-contamination to unaffected areas of the house. They will generally wear head coverings, safety glasses, respirators, water-proof coveralls, water-proof gloves, and water-proof shoe coverings or boots.
2. Extracting Standing Water
The team will extract all of the standing water and some of the debris using industrial-grade pumps. This is a quick, efficient method of removing the water to begin the subsequent phases of the restoration.
3. Tearing Out Wet Materials
Everything will probably have to be removed from the affected area. Clearing the space of furniture and other contents will provide more room to work and will make it easier to clean and dry. It will also make it easier to sort out what's salvageable from what's not. This process will include the tear out of wet materials, which often includes carpet, carpet padding, portions of the drywall and sometimes part of the subfloor.
4. Cleaning and Sanitizing
Then, it's time to clean and sanitize the affected area and all of the salvageable contents. If it's not cleaned and sanitized thoroughly, you run the risk of growing bacteria and mold, both of which can be damaging to people, possessions, and even a house's structure.
5. Drying the Contents and Structure
In addition to a thorough cleaning, everything also needs to be dried completely. Even if it's adequately cleaned but left damp, mold spores are virtually everywhere, so mold can begin growing within 24 hours. If the mold gets out of control, it could turn into a worse problem than the water damage itself. Your restoration team will likely use industrial-grade fans, dehumidifiers and heat sources to promote drying.
Next time a strong storm hits your home, you will understand better what actions to take if damage occurs. You will also have a better idea of what to expect from the cleanup crew. Depending on the extent of the loss, it could take a day of work if it requires minor restoration. However, restoration could last several months if there is a lot of damage requiring tear out and structural repair. Either way, they'll make sure they return your home to its previous condition.
The 4 Steps of the Roof Damage Cleanup Process
1/14/2022 (Permalink)
 Roof leak in a Colorado Springs, CO building.
Many people think of flooding as something that happens at the base of a building. Floodwaters rise and break over barriers to flood the basement and bottom floors. Another common flooding problem associated with storms, however, is a roof leak. If the roof of your commercial building in Colorado Springs, CO, gets damaged, rain can seep in and cause further problems. Here are the steps to resolve those problems.
Steps To Cleaning Roof Damage.
1. Drying Area
The first thing that has to happen when missing shingles cause water damage in your attic or top floor is for all the excess water to be removed. Water remediation professionals use industrial pumps to remove standing water. They may increase airflow in the affected area to dry surfaces. Making sure the area is dried quickly can help prevent secondary damage such as mold growth.
2. Removing Damage
If the roof leak is significant, there may be a lot of damage not just to the roof but also to the layers of the building directly underneath it. Waterlogged walls or ceilings are no longer structurally sound. Materials have to be torn out if they cannot be salvaged.
3. Disinfecting Surfaces
Because flood water is contaminated, everything it touches must be sanitized. Professional strength cleaners are used to remove bacteria and other harmful substances. Afterward, the surfaces can be tested to ensure that they are clean.
4. Rebuilding Roof
After the cleaning is finished, the technicians repair the damaged roof. They make sure the base is strong and well-sealed against further leaks. Then they replace the shingles that are broken or missing. If any interior parts need to be rebuilt, they can do that as well.
A roof leak doesn’t always show signs of significant damage at first, so it’s important not to forget the roof in your inspection after a flood. You can avoid further problems by addressing any roof issues in a timely manner.
How To Successfully Navigate Your Flood Insurance Claim
10/24/2021 (Permalink)
 After flood damage in your Colorado Springs, CO, home, contact a professional to know what to do.
When your Colorado Springs, CO, home has been affected by flood damage, knowing which steps to take and how to prioritize those actions can be crucial. Along the way, you'll deal with many professionals who are involved in the recovery process:
- Insurance agents
- Adjusters
- Building inspectors
- Cleanup and recovery technicians
Each step of the recovery process will proceed more smoothly as you communicate and coordinate well with these service providers, especially if you fully understand your flood insurance coverage.
Working With Flood Insurance Professionals While Representing Yourself
It's important to remember that the main priority of some of these professionals, such as insurance agents and adjusters, is to keep their costs low. When it comes to making sure that quality services, procedures, and goods are being used, you are the primary person responsible.
Tips for Working With Your Insurance Agent
You may receive advice telling you to wait to make repairs until after an insurance representative or adjuster visits your property. This is a tough situation because the insurance company may give you trouble for taking action before inspections. However, it doesn't take long for water damage to get worse, increasing the costs of cleanup and repairs.
- Take action immediately. Contact your insurance company right away, request a certified copy of your flood insurance policy, and ask about the best way to submit proof of loss.
- Keep a detailed, written record of every conversation you have with the insurance company. Your record should include the date, the time, names of the people you talked to, and the gist of the conversation.
- Reach out to third-party professionals for damage estimates. It's best to have at least three to be sure you get enough money for the necessary repairs.
- Document everything before beginning any cleanup efforts. Take pictures and videos of all damage, keep receipts, and write up any explanations.
- Hold onto damaged items to show the insurance company.
Tips for Working With Adjusters
The insurance adjuster works on behalf of the insurance company and will be looking for ways to keep your claim low. Adjusters are also very busy, so you may have a long wait until the professional shows up. You may have better success if you hire a public adjuster to represent you as you work with professionals from your insurance company.
- Save copies of the pictures, videos, and written descriptions to share with adjusters.
- Provide pictures of your home before the damage happened.
- Contact a realtor for a copy of the most current property inspector's appraisal and findings.
- Obtain appraisals from your mortgage provider and other lenders.
- Start preparing an itemized list of everything in your home that was damaged, including items such as toiletries. Include detailed descriptions, brand names, costs, and whether you have receipts.
It may not be wise to start repairs before you have a go-ahead from the insurance company, but you can take emergency and mitigation steps. These include hiring an emergency cleanup and mitigation company to remove standing water, move soaked materials to a dry place, and board up doors and windows. These services that prevent mold damage and other secondary harm may well be covered by your flood insurance policy.
5 Steps for Properly Maintaining Your Sump Pump
8/20/2021 (Permalink)
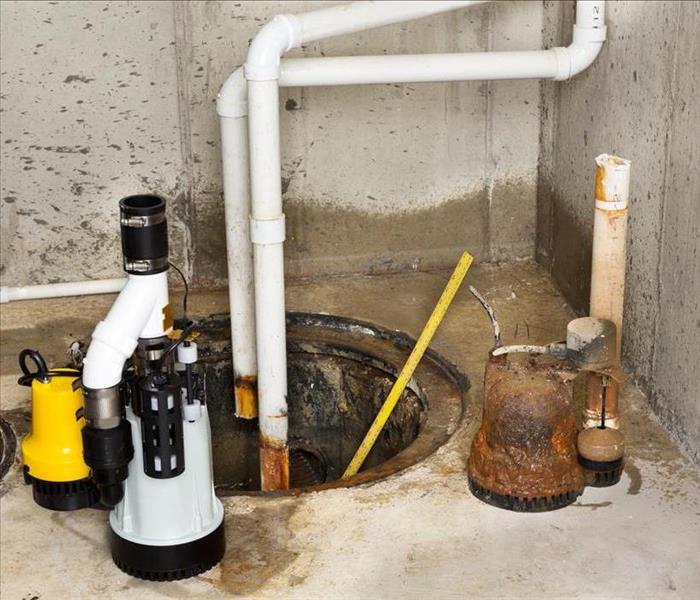 A sump pump will avoid water damage in your Colorado Springs, CO, home.
Water damage is one of the worst issues you may deal with as a homeowner, and anyone with a basement and a climate that involves a lot of rainfall may face flooding on a regular basis. A sump pump, however, provides a great solution. This device effectively moves water away from the home, even during power outages. If you want to be sure that the pump works and works well, you need to take a few steps to keep it in proper working condition.
Make sure that the pump is properly plugged into a ground fault circuit interrupter outlet. Inspect the cord regularly to catch and repair any signs of fraying or damage. Don't rely solely on your GFCI connection; a backup battery helps ensure the smooth operation of the pump.
Test the sump pump and the backup battery at least once a year. Slowly, pour a bucket of water into the pump. The device should activate when the water reaches a marked level. If it doesn't begin operating, there may be a clog, or it could be broken. If the pump does activate appropriately, test the battery by unplugging the pump and performing the same test.
Keep the components of the pump clean for efficient operation. This can be done simply by opening the lid and looking inside. (You may need a flashlight for this.) Clear out any debris, dirt, or other gunk. Be sure to check all vent holes, discharge pipes, and incoming and outgoing drainage lines to be sure that water can flow through them freely.
Update any old, worn-out parts. This step is particularly important if the sump pump has been used several times. The float switch is most likely to wear out and should be changed every two years, if not more often. Visually inspect the intake screen for clogs and for damage. This screen should be changed if you can see the damage. Experts recommend that the backup battery is replaced every two or three years; refer to the manufacturer's handbook. Finally, the pump itself may need to be replaced if several years have gone by. Most units last between seven and ten years, but some need to be changed out every five years because of heavy use.
Watch out for signs that your pump needs repairs. You may see rust on the pump itself or on any of the parts. If you can scrub away the rust, the pump will still probably work properly. If you can't, contact a professional for repairs or replacement. Don't ignore any musty, rotten smells that come from your basement. Pay attention to loud humming or banging noises. Any of these smells and sounds could be signs of damage or malfunction. If you find water, whether drips or pools, in your basement, the pump needs to be repaired.
If your sump pump fails, you could face a lot of expensive damage, in addition to the costs of hiring water damage cleanup and repair professionals. Routine pump maintenance is one of the best ways to protect your Colorado Springs, CO, home, and property from this situation.
The Dangers of Black Water
7/29/2021 (Permalink)
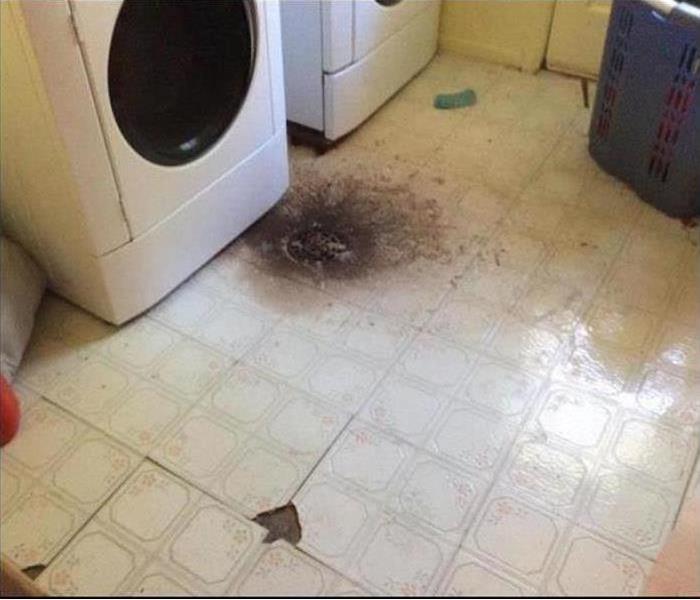 Sewage backup on laundry room in a Colorado Springs, CO home.
Anytime water gets into your business, it’s a problem. Flood water can damage your property, furniture, electronics, and office items. In the worst cases, flooding can destroy everything in its path. However, the worst flooding situation you could encounter at your Colorado Springs, CO, business is a category 3 flood, which is when black water invades. This poses a severe health risk to everyone its way.
What Is It?
Flooding can occur in many ways. A significant thunderstorm could roll into your town, and the excess rain could overwhelm your property’s drainage system, causing terrible storm damage. Or, a pipe could break in your home, spilling gallons of water onto your floor or in your walls. When flooding and sewage mix, you have black water.
- It’s so named because it contains feces from sewage systems.
- It can also occur when your toilet overflows.
- It can occur when city sewage systems back up during and after a large storm.
What Are the Dangers?
Because this type of flooding mixes with human waste, it poses a major health concern to anyone. It is best to call professional help to remove the water and make sure you and your employees stay out of the water.
Precautions
If you suspect this type of flood water, it’s vital that you leave the area to safety without delay. Do not touch the water or attempt to remove anything from it. Call a professional flood cleanup company right away.
What the Pros Will Do
A well-trained crew will come to your business to remove the water and ensure that it is once again safe to come inside. Crews will work with city utility teams to stop the water from coming into your building. The cleanup company will thoroughly dry and sanitize the affected area with the appropriate equipment.
Flood water mixed with sewage is nothing to take lightly. Make sure you understand the dangers and get a qualified company to handle the incident.
How To File a Flood Claim
7/15/2021 (Permalink)
 Knowing how to file an insurance claim after storm damage is fundamental to cover most of the repairs.
When a storm floods your home in Colorado Springs, CO, a good flood policy may cover at least part of the cost of the repairs. To get the most out of your coverage, however, you must know how to file a flood claim correctly. Here are some tips to help ensure that you give your provider all the information needed to analyze your case.
Contact Agent
As soon as you know that damage has occurred, your insurance company needs to know it, too. One of the first calls you should make after the storm passes is to your provider. Before you make the call, gather the basic information needed to start an insurance claim:
- Your policy number
- Date the damage occurred
- General extent of the damage
The company usually sends an adjuster out to survey your home and make note of the damage. Adjusters conduct a walkthrough of the property to see firsthand what needs to be repaired.
Document Everything
Your insurance company may require proof of damage before a payout can be made. You should be prepared to back up your flood claim with pictures or video of the damage to your home. Additionally, it's a good idea to make a list of all the items that will need to be replaced and approximately how much it will cost to do so.
Coordinate With Mitigation Team
The water damage remediation specialists whom you hire to repair your home can also provide valuable information for your claim. After the initial assessment, they provide a list of tasks they must complete and an estimate for the final bill. They can also keep you and your provider informed about the cost of necessary repairs throughout the cleanup process.
Filing a flood claim doesn't have to be difficult. If you keep your insurance company informed and document the damage well, you are more likely to get the payout you need.
As a First Responder, How Can I Stay Safe During a Flood?
5/28/2021 (Permalink)
 Complete a safe flood response
As a first responder in Colorado Springs, CO, you're working on the front lines during all types of disasters. Stress comes with the territory. A major flood can be one of the anxiety-provoking situations. Not only are you focused on helping others, but you must focus on protecting yourself.
Follow these tips for completing a safe flood response:
3 Tips For Completing a Safe Flood Response
1. Regularly Wash Your Hands
When dealing with floodwaters, you never know what class of water you'll encounter, but it will present hazards. You'll likely come into contact with waterborne illness and contaminated materials. Make sure to wash your hands well with soap and water or hand sanitizer before all work breaks and meals and at the end of your shift.
2. Wear Personal Protective Equipment
Wearing PPE is vital whenever you're serving as a first responder. Working in a flooded area requires some specific types of protection for various hazards similar to those of flood remediation professionals. Chemical-resistant PPE is preferable, especially if you suspect the presence of chemical hazards. The essential protective gear includes safety goggles, a respirator mask, disposable latex gloves, coveralls and waterproof boots. Always discard or launder PPE before taking them to a personal area like your vehicle or home.
3. Know When To Get Medical Treatment
Wearing the proper PPE should protect you well, but there are always risks when working in disaster areas. If you have a cut or other broken skin issues that have come into contact with contaminants, you should make sure you're up to date on your immunizations. If you haven't had your Tetanus vaccination within the last five years, you must get another. Also, consider getting a Hepatitis A vaccine if you haven't had one recently.
There are signs of contamination-related health issues for which a first responder should immediately seek medical care. Some of these issues include fever, dizziness, headache, muscle aches, nausea, diarrhea, and abdominal cramps. Make sure you're familiar with all safety precautions and adequately prepare yourself. After all, without your well-being, it's impossible to assist others.
The Purpose of Flood Cuts
1/28/2021 (Permalink)
 Heavy storms can lead to severe flooding damage.
A heavy storm can cause a significant amount of damage to your home. Lightning can strike trees, causing them to fall on the house and tear up the roof. High winds that pick up debris can lead to broken windows. The main concern during a storm, however, is likely flooding. If a weather event in Colorado Springs, CO, leaves behind a lot of standing water in your home, flood restoration specialists may have to make a flood cut to remove all the damage.
When Is a Flood Cut Necessary?
A flood cut is the method the cleanup team uses to tear out materials that can't be salvaged. Technicians will probably need to use a flood cut if the water damage meets certain criteria:
- High levels of contamination
- Suspected damage in hard-to-reach areas
- Compromised structural integrity of the wall
Flooding from a storm almost always leads to a flood cut because the water is contaminated. If the standing water in your home comes from a clean sources, however, technicians may try to save the wall, even if there is a lot of water.
How Is a Flood Cut Measured?
When removing drywall, the mitigation team wants to make sure that it tears out all the damage. Specialists typically make a flood cut at least 12 inches above the spot where the water damage ends. This ensures that any unseen damage is also removed.
What Happens After the Flood Cut Is Made?
Once the cut is made, the technicians remove the drywall. They take out all the damaged material, including any damp insulation behind the wall. Before they rebuild, they have to make sure the area is clean and dry so that no secondary damage occurs.
If a storm causes flooding in your home, it may take more than simply removing the water and wiping down surfaces to complete the repairs. Technicians may have to make flood cuts on your walls to remove all the damage.


 24/7 Emergency Service